TM 9-2320-269-20-1
PINTLE HOOK - CONTINUED
ACTION
LOCATION
ITEM
REMARKS
DISASSEMBLY - CONTINUED
NOTE
Do not take out latch pin, latch, and spring unless it Is necessary to replace parts. If not replacing
parts, skip steps 15 and 16a, but do step 16b.
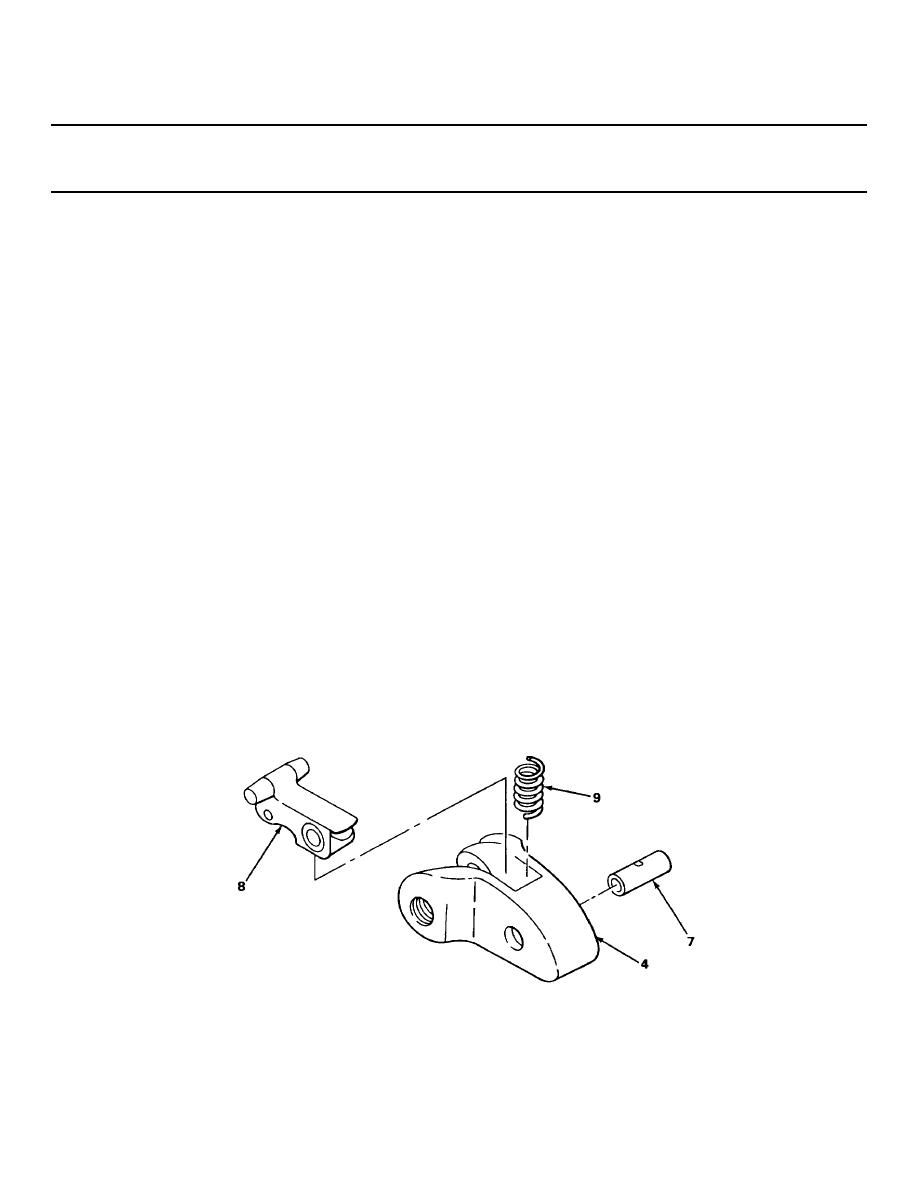
15. Pintle lock (4)
Latch pin (7)
Using ball-peen hammer and 3/8-inch
and latch (8)
drive-pin punch against untapped end,
drive out.
16. Pintle lock (4)
Latch (8) and
a.
Take out.
spring (9)
b.
Take pintle lock (4) out of vise.
ASSEMBLY
NOTE
If latch pin, latch, and spring were not taken out, do steps 17a, but skip steps 17b and 18.
17.
Spring (9) and
a.
Place pintle lock (4) in vise with jaw
latch (8)
caps.
b.
Place In position.
18. Pintle lock (4)
Latch pin (7)
a.
Push down on latch (8) to aline holes
and latch (8)
between lock (4) and latch.
b.
Using ball-peen hammer and brass
driftpin against untapped end, drive
into place.
c.
Using ball-peen hammer and 7132-inch
center punch, stake in place in four
places around each end of latch pin (7)
on each side of pintle lock (4).
TA229010
2-695


 Previous Page
