
TM 9-2320-269-20-1
PINTLE HOOK - CONTINUED
ACTION
LOCATION
ITEM
REMARKS
REMOVAL
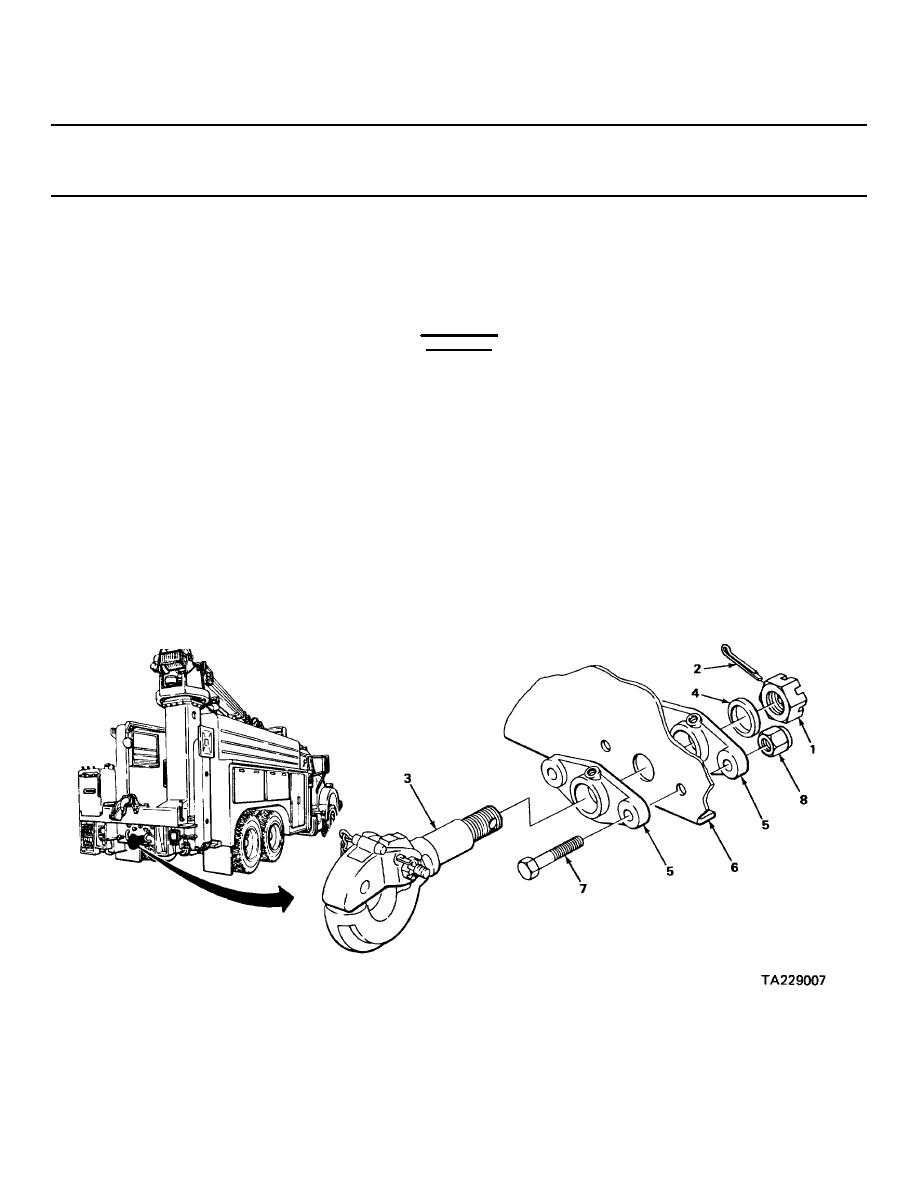
1. Nut (1)
Cotter pin (2)
Using diagonal cutting pliers, take out
and get rid of.
2. Pintle hook (3)
Nut (1) and flat
Using 2 1/16-inch open-end wrench,
washer (4)
unscrew and take off while assistant holds
pry bar through pintle (3).
WARNING
Be careful when working with large or heavy objects to avoid personnel injury.
3. Bracket (5)
Pintle hook (3)
With aid of assistant, using ball -peen
hammer and brass driftpin, take out.
NOTE
If only pintle hook is being removed, go to INSTALLATION.
4. Crossmember (6)
Two screws (7),
a.
Have assistant hold bracket (5) in
nuts (8), and
position.
brackets (5)
b.
Using 1 1/8-inch socket, hinged
handle with 3/4-inch drive, and
1 1/8-inch open-end wrench, un-
screw and take off.
c.
Take off bracket (5).
2-692

 Previous Page
