TM 9-2320-269-20-1
POWER DIVIDER LOCKOUT VALVE - CONTINUED
ACTION
LOCATION
ITEM
REMARKS
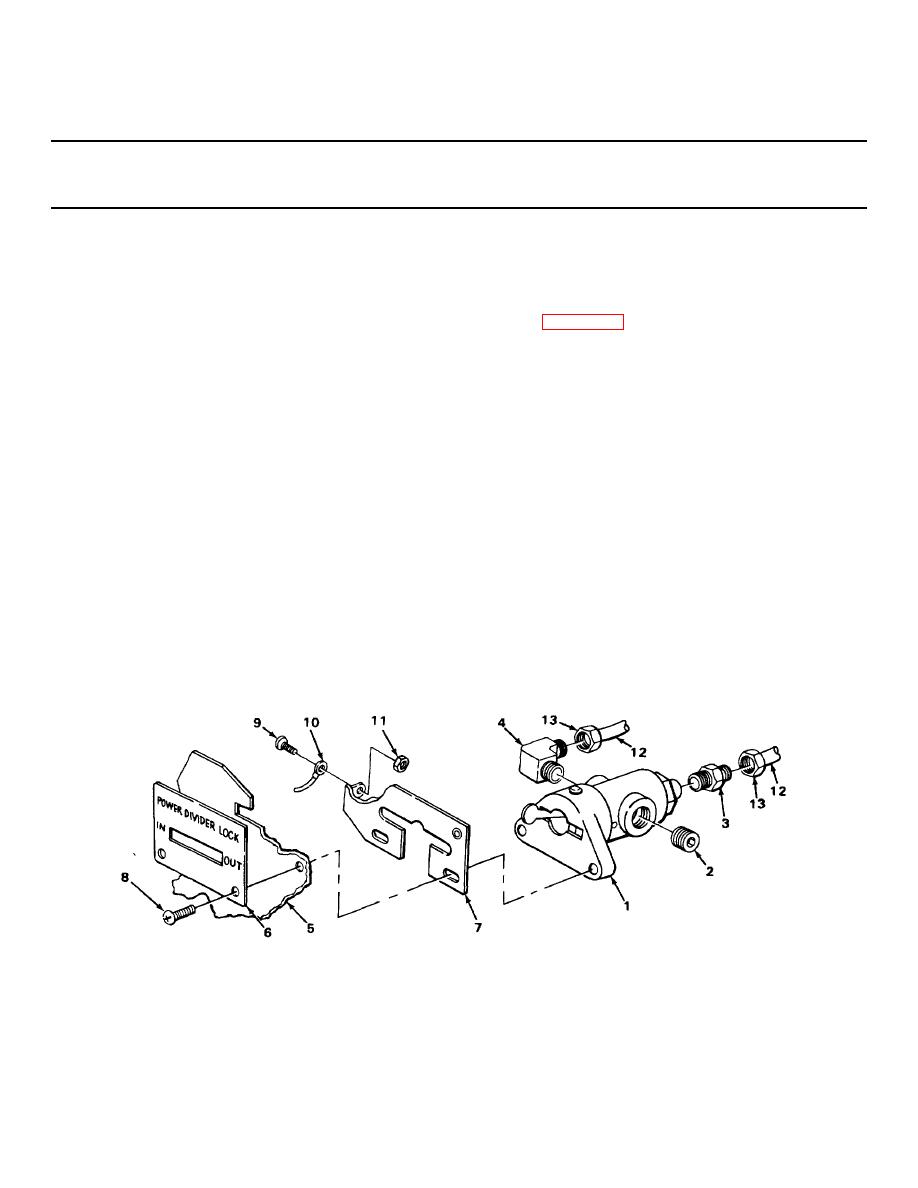
6. Valve (1)
Plug (2)
a. Wrap threads with teflon tape
b. Screw In, and tighten using socket-
head screw key.
7.
Coupling (3) and
a. Wrap threads with teflon tape
elbow (4)
b. Screw in, and tighten using 7/16-Inch
wrench.
8. Dash panel (5)
Valve (1), two
a. Use twisting motion, and put valve
plates (6) and (7),
through panel.
and two screws (8)
b. Put screw through plate panel and into
valve.
c. Tighten using screwdriver.
9.
New screw (9),
a. Take tape off ground wire (10).
ground wire (10),
b. Put screw through wire (10) and
and nut (11)
plate (7).
c. Put nut (11) on screw (9), and tighten
using screwdriver and 11/32-inch
wrench.
10. Coupling (3)
Two lines (12) and
Screw in, and tighten using 7/16-inch and
and elbow (4)
nuts (13)
9/16-inch wrenches.
Check tags to make sure of
proper positioning.
2-504


 Previous Page
